Published · Updated
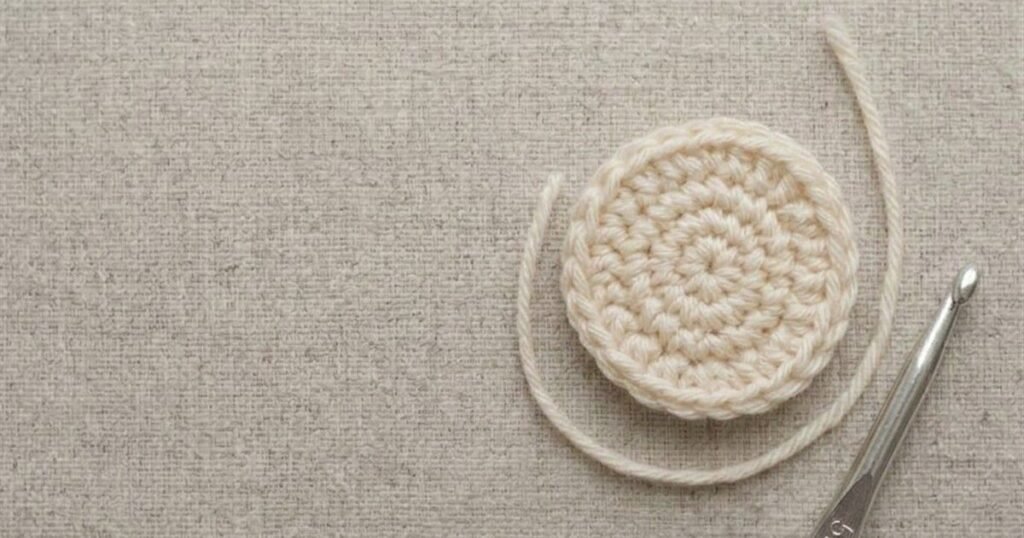
The magic ring (also called an adjustable ring or magic circle) is how many amigurumi patterns begin. It lets you crochet stitches around a loop of yarn and then pull the center closed, so there is no hole at the top of a head or the tip of a limb. It feels awkward the first few times, but it becomes automatic with a little practice.
Before You Start
You should be comfortable with single crochet first, because you will begin working stitches into the ring right away. Smooth, non-fuzzy yarn in a light color is much easier to learn with, since you can see each strand clearly. You will also need a crochet hook that suits your yarn and a stitch marker, which is helpful for marking your first stitch when you work in a spiral.
Step by Step
- Leave a tail of about 6 inches (15 cm). Wrap the yarn around two fingers of your non-hook hand so the yarn crosses over itself and forms a ring, with the working yarn running to the ball. You can wrap once or twice; twice makes a sturdier ring that is easier to hold while you learn.
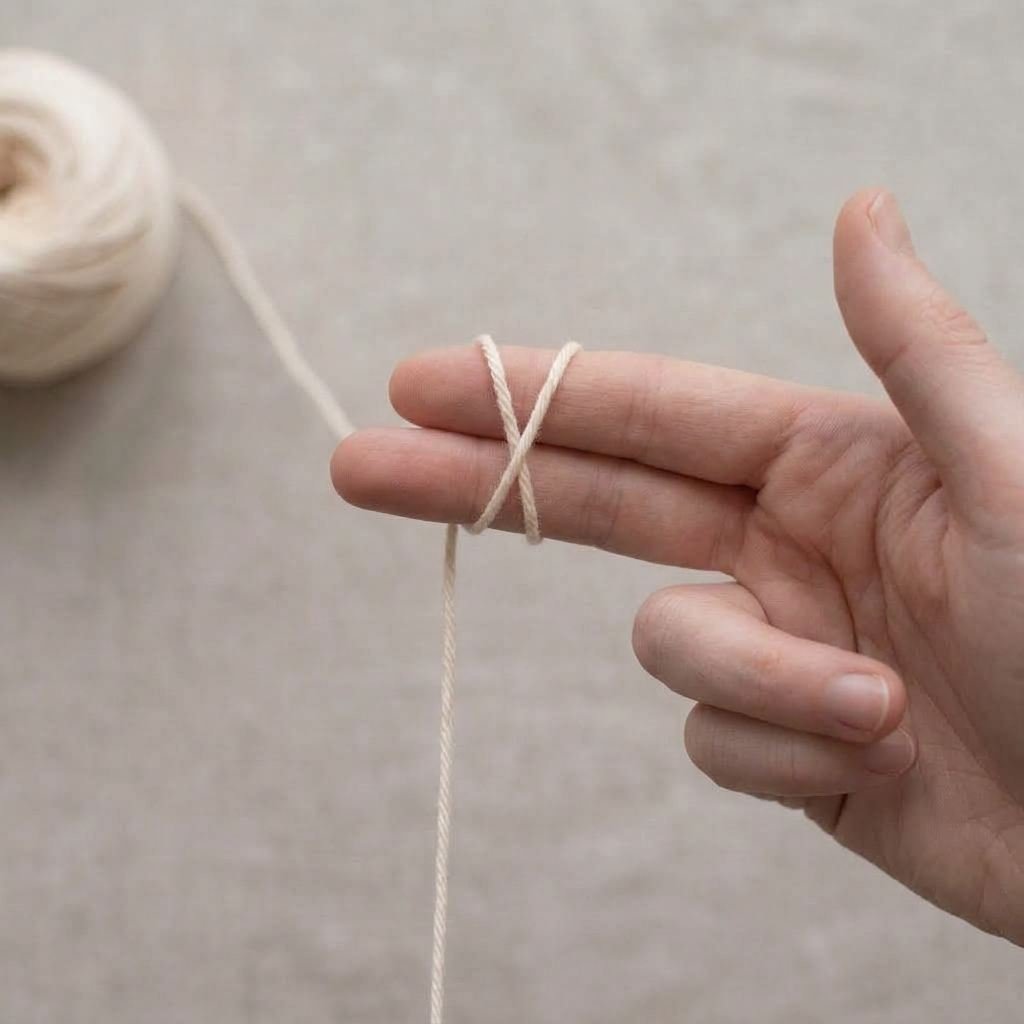
Step 1: wrap the yarn around two fingers. - Pinch the point where the yarn crosses, and carefully slide the ring off your fingers without letting it fall apart.
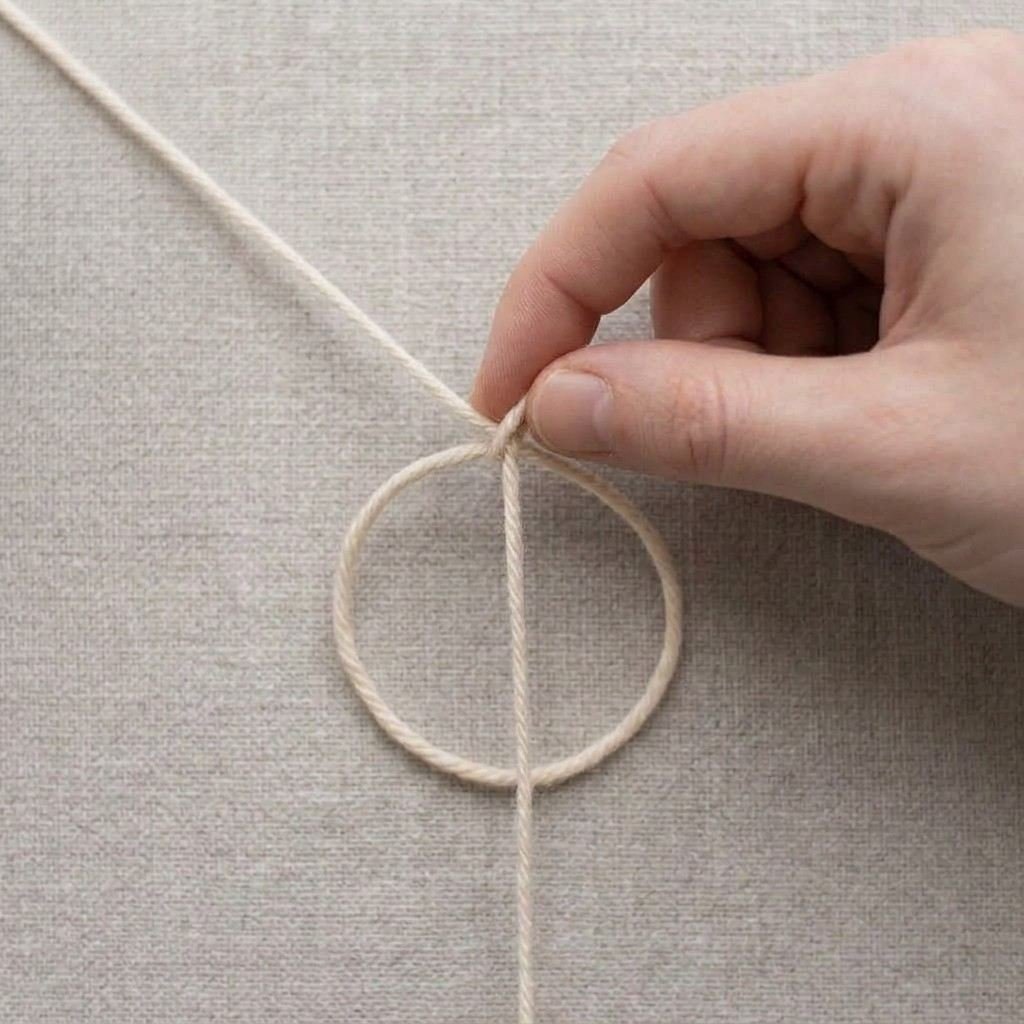
Step 2: pinch the crossing point. - Put your hook through the center of the ring, catch the working yarn, and pull up a loop through the ring. The loop is now on your hook.
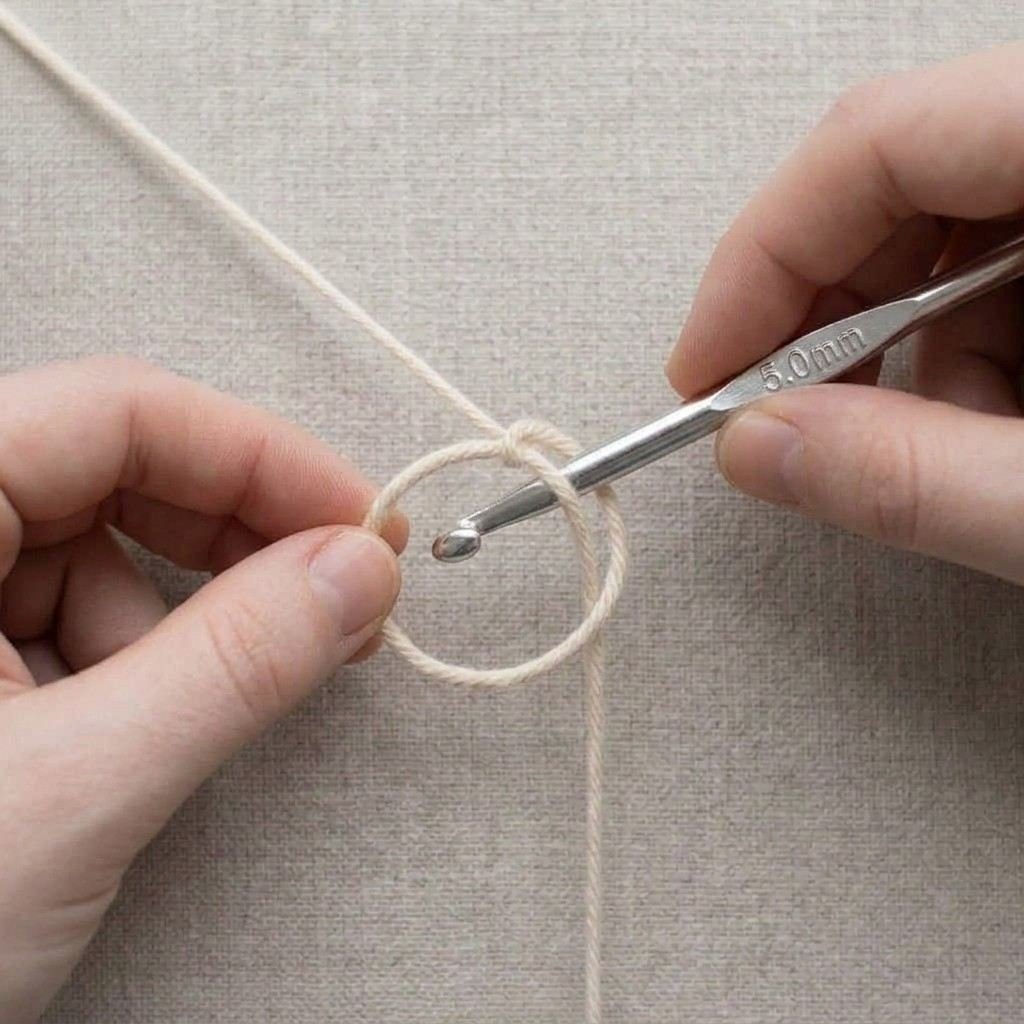
Step 3: the hook goes through the center of the ring. 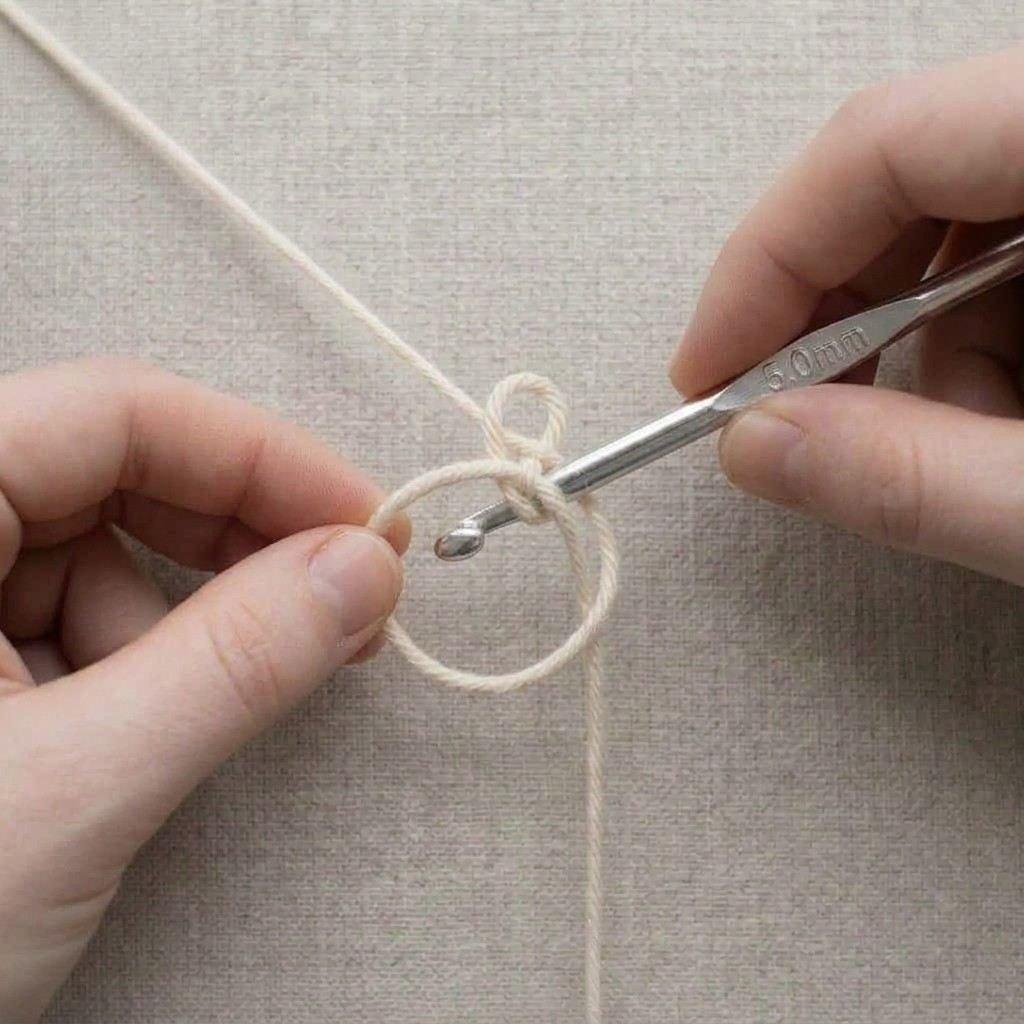
Step 3: pull up a loop through the ring. - Yarn over and pull through the loop on your hook. This chain locks the ring in place. It does not count as a stitch.
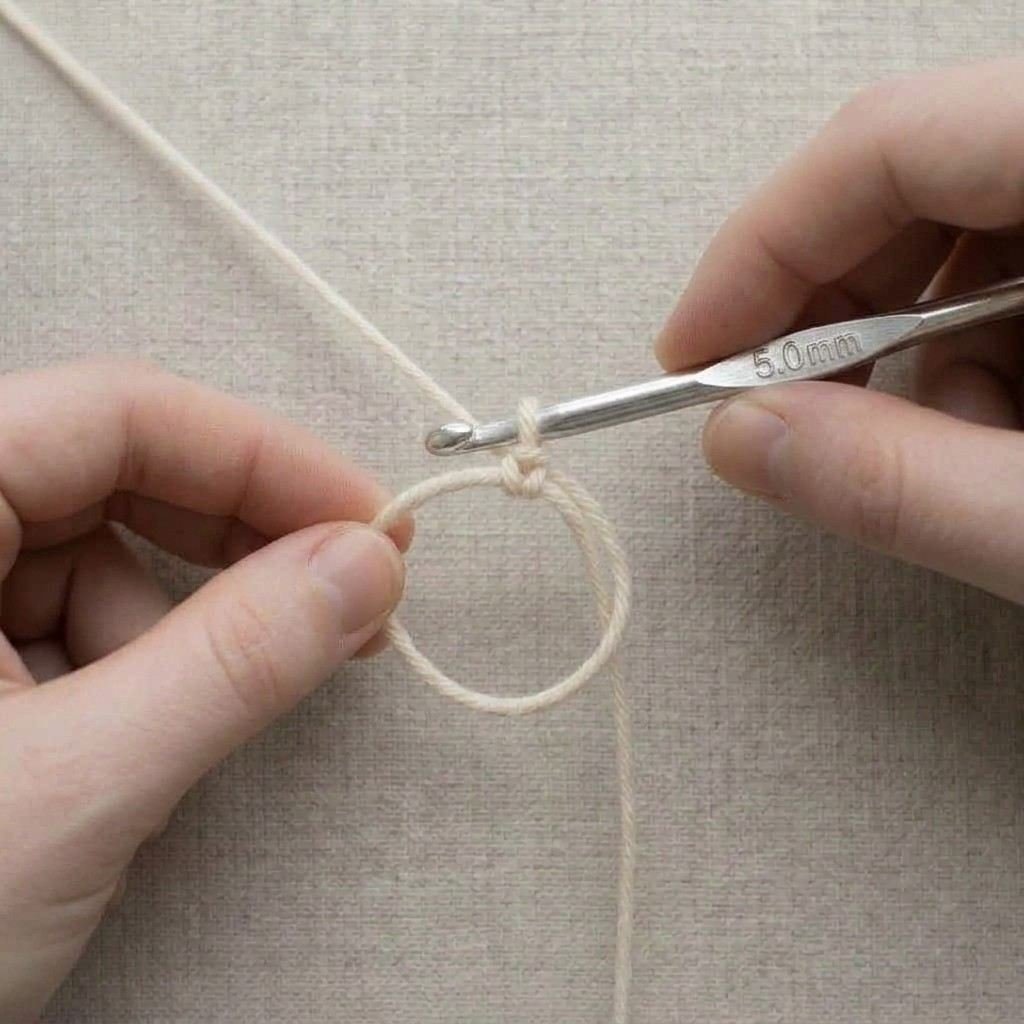
Step 4: a chain stitch locks the ring. - Work your first round of single crochet into the ring. Put the hook through the center of the ring, yarn over, pull up a loop, yarn over again, and pull through both loops. Repeat for the number of stitches your pattern calls for.
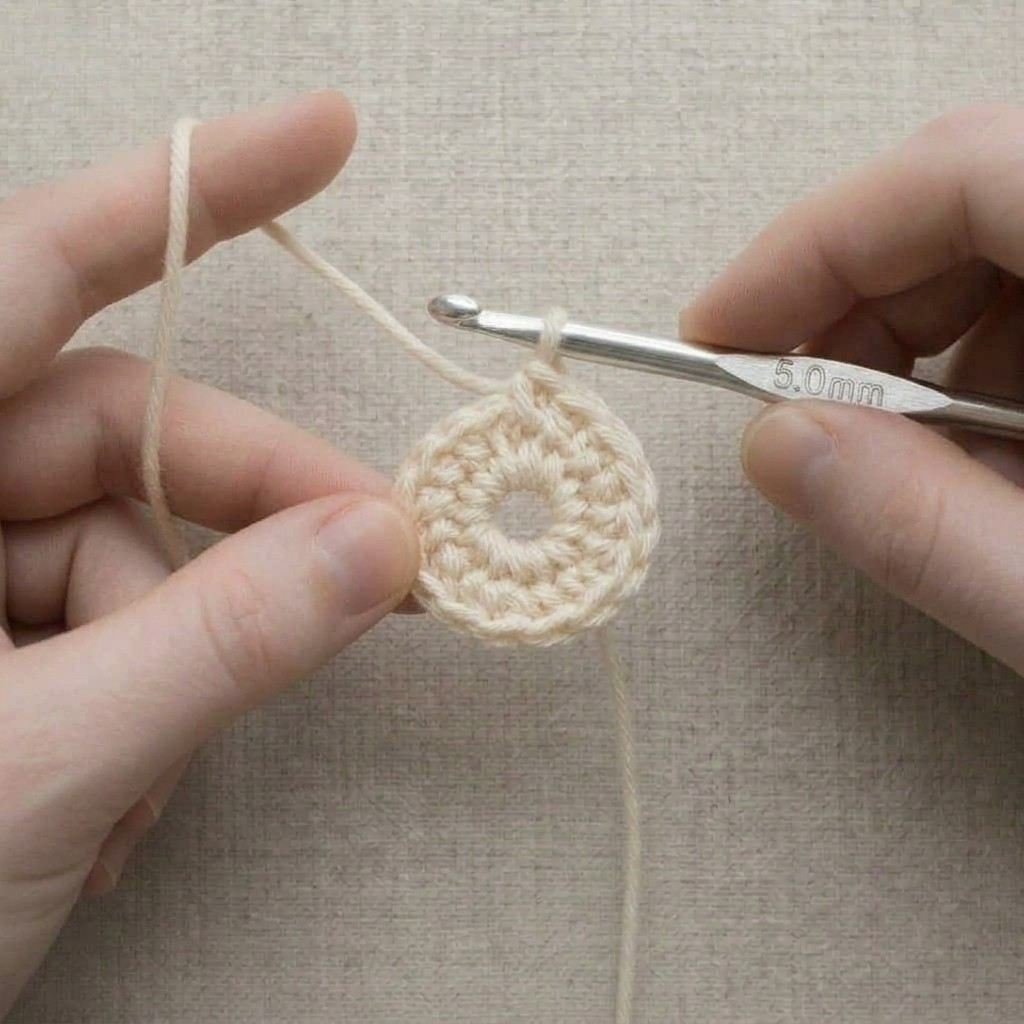
Step 5: single crochet stitches worked into the ring. - Pull the tail to close the ring. One of the ring strands will slide and draw the stitches together. If pulling the tail does not tighten the ring, pull the other strand instead.
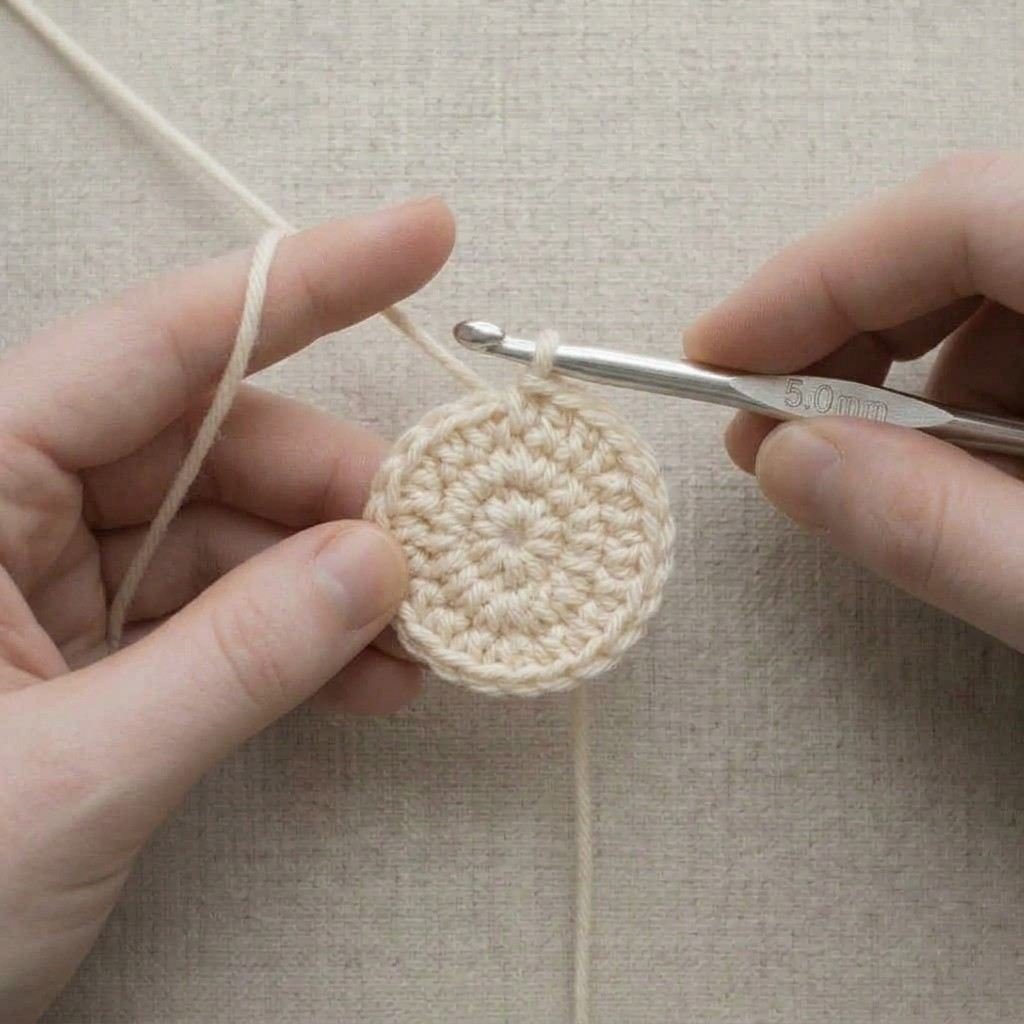
Step 6: pull the tail to close the center. - Continue according to your pattern. If you are working in a spiral, put a stitch marker in the first stitch of the round. If the pattern asks you to join, slip stitch into the first stitch.
If you cannot get the hang of it yet, that is completely normal. A simple substitute is to chain 2 and work your first round into the second chain from the hook. It leaves a small hole in the center, but it works while you practice.
How Many Stitches Go in the Ring?
It depends on the pattern. Many amigurumi patterns begin with six single crochet stitches in the ring, while others use a different number. Always follow the number in your pattern, because every later round is built on it.
Securing the Ring
After a round or two, pull the tail firmly once more to make sure the center is tight. When the project is finished, thread the tail onto a yarn needle and weave it through several stitches on the back of the work. This keeps the ring from loosening as the piece is stuffed and handled.
Common Mistakes and How to Fix Them
- The ring will not close. You are probably pulling the wrong strand. Check which strand moves the loop, and pull that one.
- The ring opens up later. The tail was not tightened enough or not woven in securely. Pull the tail snugly and weave it through several stitches.
- The ring is too small to work into. Wrap the yarn around your fingers again and make the ring a bit larger. A slightly bigger ring is easier to stitch into, and it still closes completely.
- The hook splits the yarn. Use a smooth, tightly twisted yarn while you learn, and look at the yarn rather than the hook tip as you insert the hook.
- A small hole remains after closing. Check that every stitch was worked into the ring and not beside it, and that you pulled the tail firmly.
Tips for Left-Handers
Mirror every movement. Wrap the yarn around two fingers of your right hand and hold the hook in your left hand. Every step is the same, just reversed. If you are learning from a right-handed video, play it in a mirror or look for a left-handed tutorial.
Practice Tips
- Practice with a larger hook and thicker yarn first, so you can see what each strand is doing. Then move down to the size your project needs.
- Undo the ring and repeat it several times in a row, rather than making one and moving on.
- Make a practice ring of six stitches and close it. If the center disappears and the stitches sit in a neat circle, you have it.
Frequently Asked Questions
Do I need a slip knot for a magic ring?
No. The ring replaces the slip knot. You still need to know the slip knot for projects that begin with a chain.
Can I use a magic ring for any project?
It is meant for projects worked in the round, such as amigurumi, hats, and coasters.
Why do I need a tail?
You pull the tail to close the ring, and you weave it in at the end to keep the ring from loosening.
Is it harder with fuzzy yarn?
Yes. Fuzzy or textured yarn hides the strands and makes it harder to see which one to pull. Smooth yarn is a better choice while you learn.
What is the alternative if I get stuck?
Chain 2 and work into the second chain from the hook. Learn the chain stitch first if you need it.
Put It Into Practice
Make a magic ring and work 6 single crochet into it. Pull the tail until the ring closes and the center has no hole. Then work 2 single crochet in each stitch around, which gives you 12 stitches. Count them, and if you have 12, you have made your first flat circle.
When you are comfortable with rounds, learn the half double crochet, a slightly taller stitch.
The beginner series
- 1. Slip Knot
- 2. Chain Stitch
- 3. Single Crochet
- 4. Magic Ring (this page)
- 5. Half Double Crochet
Step images in this tutorial were created with AI to show each stitch.